Showing posts with label How To. Show all posts

When a family member is in the hospital, the stress of their illness is often compounded by the anxiety of a growing hospital bill. One of the quickest ways to get financial relief in the Philippines is by requesting a Guarantee Letter (GL) from government offices, such as senators, partylists, or local officials.


While many offices accept walk-ins, sending an email is a safer, faster alternative—especially if you cannot leave the patient's bedside.

However, because these offices receive thousands of emails daily, yours needs to be clear, professional, and complete. Here is a step-by-step guide on how to write a GL request email, along with a template you can use right away.

Read my Personal Experience of Availing Malasakit Center Medical and Financial Assistance to know more.


3 Things Your Email Must Clearly State

Before you start typing, keep in mind that the staff reviewing your email will be looking for three key pieces of information within the first few seconds:

  • Who is the patient and where are they? (Full name and the specific hospital).
  • What is the situation? (The medical condition and the current financial need).
  • Are the documents attached? (Without clear attachments, your email will likely be set aside).


Sample Email Template

You can copy, paste, and fill out this template. Make sure to replace the bracketed information with your actual details.


The Template

Subject: Request for Medical Assistance (Guarantee Letter) – [Patient's Full Name]
Dear Office of [Name of Senator or Partylist, e.g., Senator Bong Go / ACT-CIS Partylist],
Good day.


I am writing to respectfully request medical financial assistance or a Guarantee Letter (GL) for my [relationship to patient, e.g., father/mother/child/myself], [Patient's Full Name], who is currently admitted at [Name of Hospital] due to [Briefly state the illness or medical condition, e.g., Stage 3 Chronic Kidney Disease / Severe Pneumonia].

As of [Date today], our running hospital bill has reached [Amount, e.g., ₱45,000.00] and continues to increase. Because of our current financial situation, our family is struggling heavily to cover these unexpected medical expenses.

To support this request, I have attached scanned copies of the required documents for your review:
  • Medical Certificate / Clinical Abstract
  • Barangay Certificate of Indigency
  • Valid IDs (Patient and Representative)
  • Latest Statement of Account (SOA) / Running Bill
  • Formal Request Letter (Signed)

[Add other documents if applicable, e.g., Laboratory Request / Medicine Prescription]

Any amount or assistance your office can extend to help lessen our hospital bill will be a massive relief to our family.

Thank you very much for your time, kind consideration, and your continuous service to the Filipino people. I pray for your positive response.

Respectfully yours,
[Your Full Name]
[Your Relationship to the Patient, e.g., Daughter]
[Your Complete Address]
[Your Mobile Number]
[Your Email Address]


Tips to Avoid Delays in Your Request

To make sure your email gets processed as quickly as possible, keep these important tips in mind:

Make Attachments Readable: Do not send blurry or poorly lit photos of your documents. Use a free mobile scanning app (like Adobe Scan or CamScanner) to convert your documents into clear, readable PDFs.

Watch the File Size: Email providers usually limit total attachments to 25MB. If you attach too many high-resolution photos, the email might fail to send. Compress the files if necessary.

Keep the Subject Line Clear: Do not leave the subject line blank or just write "Help." Using the format "Request for Medical Assistance – [Patient Name]" helps the office sort and track your request instantly.

Send Individually: Avoid "BCC-ing" or sending one email to 20 different senators at the same time. Send a separate, personalized email to each office. It looks more respectful and ensures it doesn't get flagged as spam.


Remember

A Guarantee Letter is not cash—it is a document issued by the official's office ensuring the hospital that a specific amount of the bill will be covered by government funds. Always check if your hospital accepts GLs from the specific office you are applying to before submitting your request.

How to Write a Guarantee Letter (GL) Request Email for Medical Assistance


When a loved one is hospitalized, the financial burden can feel just as heavy as the medical one. Fortunately, there are various government programs and offices designed to provide medical assistance through Guarantee Letters (GL).


If you are currently navigating this process, here is a consolidated guide to the requirements and a directory of offices you can reach out to for support.


Requirements

Before approaching any senator or partylist office, it is crucial to have your paperwork in order. Being prepared speeds up the processing time significantly.

Prepare these documents in advance:


  • Medical Certificate/Clinical Abstract: Must include the attending physician's signature and license number.
  • Barangay Certificate of Indigency: Proves your residency and financial status.
  • Valid IDs: Provide copies for both the patient and the person processing the request.
  • Statement of Account (SOA) or Running Bill: Essential if the funds are for hospital admission costs.
  • Prescription: Required if you are requesting assistance for medicines.
  • Laboratory Request & Price Quotation: Necessary for dialysis, chemotherapy, or diagnostic tests.
  • Request Letter: A formal letter addressed to the specific official. It should clearly state the patient’s condition and the specific assistance needed.
  • Authorization Letter: Mandatory if the patient is not the one personally submitting the documents.
  • Social Case Study: While not required by every office, it is highly recommended to have one prepared from your local Social Welfare office.


Philippine Senators

You may contact these offices via their official email addresses or social media pages for inquiries regarding medical assistance.

Bam Aquino
  • facebook.com/benignobamaquino
  • team.bamaquino2013@gmail.com
  • (632) 8-552-6601

Alan Peter Cayetano
  • facebook.com/alanpetercayetano
  • alanpeter@cayetano.com.ph
  • (632) 8-552-6601

Pia Cayetano
  • facebook.com/PiaCayetanoOfficial
  • pia@piacayetano.ph
  • (632) 8-462-3862

Ronald "Bato" dela Rosa
  • facebook.com/BatoDelaRosaOfficial
  • osbatodelarosa@gmail.com
  • (632) 8-552-6601

JV Ejercito
  • facebook.com/senjvejercito
  • publicassistance@jvejercito.com
  • (632) 8-552-6601

Francis "Chiz" Escudero
  • facebook.com/officialchizescudero
  • senator@chizescudero.com
  • (632) 8-571-4641

Jinggoy Estrada
  • facebook.com/JinggoyEstrada
  • anakngmasa@jinggoyestrada.ph
  • (632) 8-552-6601

Sherwin "Win" Gatchalian
  • facebook.com/WinGatchalian74
  • email@wingatchalian.com
  • (632) 8-551-9223

Christopher "Bong" Go
  • facebook.com/BongGoPage
  • senbgconcerns@gmail.com
  • (632) 8-286-7045

Risa Hontiveros
  • facebook.com/hontiverosrisa
  • risahq@gmail.com
  • (632) 8-807-8156

Panfilo "Ping" Lacson
  • facebook.com/PingLacsonOfficial
  • ospml2025@gmail.com
  • (632) 8-552-6601

Lito Lapid
  • facebook.com/SenatorLitoLapid
  • sen.litolapid@senate.gov.ph
  • (632) 8-552-6601

Loren Legarda
  • facebook.com/senatorlorenlegarda
  • loren@lorenlegarda.com.ph
  • (632) 8-552-6601

Rodante Marcoleta
  • facebook.com/RodanteMarcoletaOfficial
  • osmarcoleta2025@gmail.com
  • (632) 8-552-6601

Imee Marcos
  • facebook.com/ImeeMarcos
  • osimeemarcos@gmail.com
  • (632) 8-286-0970

Robinhood Padilla
  • facebook.com/ROBINPADILLA.OFFICIAL
  • osrobinpadilla@gmail.com
  • (632) 8-571-5175

Kiko Pangilinan
  • facebook.com/officialkikopangilinan
  • kiko@kikopangilinan.com
  • (632) 8-511-7630

Vicente "Tito" Sotto III
  • facebook.com/TeamTitoSotto
  • senatorvicentesotto@gmail.com
  • (632) 8-552-6001

Erwin Tulfo
  • facebook.com/ErwinTulfoMedia
  • ettulfo@senatorerwintulfo.com
  • (632) 8-552-6601

Raffy Tulfo
  • facebook.com/raffytulfoinaction
  • raffy.tulfo@teamtulfo.com
  • (632) 8-552-6601

Joel Villanueva
  • facebook.com/joelvillanueva
  • senatorjoelvillanueva@yahoo.com
  • (632) 8-807-9453

Camille Villar
  • facebook.com/CamilleVillarOfficial
  • oscamillevillar@gmail.com
  • (632) 8-552-6601

Mark Villar
  • facebook.com/MarkVillar
  • senatormarkvillar@gmail.com
  • (632) 8-571-5087

Juan Miguel "Migz" Zubiri
  • facebook.com/SenatorMigzZubiri
  • senmigzzubiri@gmail.com
  • (632) 8-804-0270


Partylist Organizations

Many partylists also maintain funds for social services.

1. AKBAYAN
facebook.com/AkbayanParty
info@akbayan.org.ph
(632) 8-931-5001

2. TINGOG
facebook.com/tingogpartylist
tingogpartylist@gmail.com
(632) 8-931-5001

3. 4PS
facebook.com/4PSPartylistOfficial
4ps.partylist@gmail.com
(632) 8-931-5001

4. ACT-CIS
facebook.com/actcisoffical
actcispartylist@gmail.com
(632) 8-931-5001

5. AKO BICOL
facebook.com/akobicolpartylistofficial
akobicol.partylist@gmail.com
(632) 8-442-3813

6. USWAG ILONGGO
facebook.com/UswagIlonggoPartylist
uswagilonggo@gmail.com
(632) 8-931-5001

7. SOLID NORTH
facebook.com/SolidNorthPartyList
solidnorthpartylist@gmail.com
(632) 8-931-5001

8. TRABAHO
facebook.com/TrabahoPartyList
trabahopartylist@gmail.com
(632) 8-931-5001

9. CIBAC
facebook.com/cibacpartylist
cibac.partylist@gmail.com
(632) 8-931-5001

10. MALASAKIT AT BAYANIHAN
facebook.com/MalasakitAtBayanihan
malasakitbayanihan@gmail.com
(632) 8-931-5001

11. SENIOR CITIZENS
facebook.com/SeniorCitizensPartylist
seniorcitizens@gmail.com
(632) 8-931-5001

12. PPP (Puwersa ng Pilipinong Pandagat)
facebook.com/PPPPartylist
ppppartylist@gmail.com
(632) 8-931-5001

13. MAMAMAYANG LIBERAL (ML)
facebook.com/MamamayangLiberal
mamamayangliberal@gmail.com
(632) 8-931-5001

14. FPJ PANDAY BAYANIHAN
facebook.com/FPJPandayBayanihan
fpjpandaybayanihan@gmail.com
(632) 8-931-5001

15. UNITED SENIOR CITIZENS
facebook.com/UnitedSeniorCitizensPartylist
unitedseniorcitizens@gmail.com
(632) 8-931-5001

16. 4K PARTYLIST
facebook.com/4KPartylist
4kpartylist@gmail.com
(632) 8-931-5001

17. LPGMA
facebook.com/LPGMAPartylist
lpgma_official@yahoo.com
(632) 8-931-5001

18. COOP-NATCCO
facebook.com/coopnatccopartylist
coopnatcco@gmail.com
(632) 8-931-5001

19. AKO BISAYA
facebook.com/AkoBisayaPartylist
akobisayapartylist@gmail.com
(632) 8-931-5001


Tips


Be Organized: Keep copies of all your documents. When requesting aid, create a "master folder" containing all originals and photocopies so you are ready no matter which office you visit.

Follow Up: Government offices are often overwhelmed. If you haven't received a response after a reasonable timeframe, don't hesitate to follow up respectfully via email or by visiting their local assistance desk.

Check Local Officials: Don't forget to visit your local City/Municipal Hall, Mayor’s Office, or Provincial Capitol. They often have their own medical assistance budgets that are faster to process because they are closer to home.


Disclaimer

This information is provided for guidance. Always check the official social media channels of these offices for the most current submission requirements and office hours.

Where and How to Get Guarantee Letter (GL) for Medical Assistance (Senators & Party list Contact Details)


Aspiring educators in the Philippines must pass the Licensure Examination for Teachers (LET) to become licensed professionals. The application process for the LET is primarily done through the Professional Regulation Commission's (PRC) online platform, the Licensure Examination and Registration Information System (LERIS).


This guide will walk you through the essential steps, from preparing your documents to securing your examination slot for the upcoming LET.


Understanding LET Application Eligibility & Requirements

Before you begin your online application, ensure you meet the general eligibility criteria and have the necessary documents ready. The PRC-CHED Joint Memorandum Circular has also introduced differentiated application schedules based on your specific teaching specialization and curriculum.


Loading...

General Eligibility


For Elementary Education: Bachelor of Elementary Education (BEEd) or its equivalent.

For Secondary Education: Bachelor in Secondary Education (BSEd) or its equivalent with a major/minor, or Allied Undergraduate/Graduate degrees with at least eighteen (18) units in Professional Education.

Must be a Filipino citizen; of good moral character; and has not been convicted by final judgment of any offense involving moral turpitude.


Key Documents to Prepare (Original and Photocopy for Appointment)


Transcript of Records (TOR): Must have the school seal, date of graduation, scanned picture, and a remark: "For Board Examination Purposes Only."

Birth Certificate: Issued by the Philippine Statistics Authority (PSA).

Marriage Contract (PSA-issued): For married female applicants.


Community Tax Certificate (Cedula).

Documentary Stamps.

NBI Clearance: (For First Timers and Repeaters).

Good Moral Character Certificates: Usually two (2) from your school, church, barangay, or employer.

Special Order (SO): For graduates of schools not exempted from CHED's issuance of SO. (Photocopy of SO duly signed by CHED).

Payment: Examination Fee of PHP 900.00.


For Repeater Applicants


Printed copy of your appointment schedule.

Original Notice of Admission (NOA) from your previous exam. If NOA is unavailable, a photocopy of your TOR may suffice.

If you failed twice, you might need to submit a Certificate of Completion of a 12-month Refresher Course from a PRC-accredited school.


Step-by-Step Guide to Applying for the LET via PRC LERIS

The entire application process is facilitated through the PRC LERIS online system (https://online.prc.gov.ph), followed by a physical appearance at a PRC office.


Part 1: Setting Up Your PRC LERIS Account (First-Time Users)


  1. Go to the LERIS Website: Open your web browser and navigate to https://online.prc.gov.ph.

  2. Register: Click the "Register" tab. Read the Terms and Conditions carefully, then click "I Agree."

  3. Enter Details: Fill in your complete personal information (name, gender, civil status, birth date, email, and desired password). Ensure accuracy as this information will be used for your professional records.

  4. Verify Account: An OTP (One-Time Password) will be sent to your registered email. Enter this OTP on the LERIS page to verify your account.

  5. Log In and Complete Profile: Log in using your new credentials. Go to the "Profile" tab and fill in all remaining personal details, contact information, family background, and especially your education details (school, course, date of graduation).

  6. Upload Photo: Upload a recent 2x2 inch passport-sized photo with a plain white background, taken within the last six months. You must be wearing decent attire with a collar, with both ears visible (if applicable), and no eyeglasses. Strictly follow photo guidelines to avoid delays.


Part 2: Applying for the LET Examination

(Assuming your LERIS account is created and your profile, including your photo, is complete.)

  1. Log in to LERIS: Access your account at https://online.prc.gov.ph.

  2. Select Transaction: Click on the "Select Transaction" button on your dashboard.

  3. Choose "Examination" Tab: Select the "Examination" tab from the options.

  4. Input Examination Details:

    • Name of Examination: Select "Professional Teacher."
    • Examination Type: Choose "First Time" or "Repeater."
    • Date of Examination: Select "September 2025."
    • Place of Examination: Select your preferred testing center (e.g., Manila, Cebu, Davao, etc.).

  5. Confirm Selection: Click "Proceed" or "Confirm Selection."

  6. Set Appointment for Document Submission: Choose your preferred PRC Regional Office or Service Center where you will submit your physical documents. Select an available date and time slot. Appointments are usually not available for the same day.

  7. Select Payment Option: Choose how you wish to pay the PHP 900.00 examination fee. Options typically include:

    • Online Payment: Via LandBank (iAccess), BancNet, GCash, Maya, or Credit/Debit Card.
    • Over-the-Counter: Through UCPB, or directly at the PRC Cashier on your appointment date.

  8. Complete Payment: Follow the instructions provided for your chosen payment method. Ensure payment is successful as your application will only proceed once payment is confirmed in the system.

  9. Print Application Form: After successful payment, print your "Application for Examination" form. This form will include your reference number, personal details, photo, and appointment information.


Part 3: Attending Your PRC Appointment


  1. Prepare All Documents: Gather all original and photocopy versions of the required documents specific to your LET category (Elementary or Secondary, First-Time or Repeater). Refer to the official PRC website or the list above for precise requirements.

  2. Attend Appointment: On your scheduled date and time, proceed to your chosen PRC Regional Office or Service Center. Bring your printed Application Form and all prepared documents.

  3. Submission and Verification: Submit your documents to the PRC staff for verification. Your biometrics (photo, fingerprints, signature) may also be captured.

  4. Receive Notice of Admission (NOA): Once your application is processed and approved, you will be issued your Notice of Admission (NOA), which you must present on the day of the examination.


Important Reminders


Deadlines: For the September 2025 LET, applications for First-Time and Repeater applicants with Bachelor of Elementary Education (without specialization) and Bachelor in Secondary Education (or equivalent with major/minor or 18 units ProfEd in specific majors) are from June 23 to August 11, 2025. Dates for other new curriculum specializations will be announced later.

Accuracy is Key: Double-check all information entered in LERIS. Inaccuracies can lead to delays or invalidation of your application.

Photo Compliance: Your uploaded photo must strictly follow PRC guidelines. This is a common reason for rejected applications.

Keep Records: Always print or save copies of your application forms, payment receipts, appointment slips, and all confirmation emails.

Official Sources: For the most accurate and updated information, always refer to the official PRC website and their official social media channels.

No Walk-ins for Application: Ensure you have a confirmed online appointment before visiting any PRC office.


By diligently following these steps, you can successfully navigate the LET application process and take a significant step towards becoming a licensed professional teacher in the Philippines.


Read More PRC Guides


How to Apply for the Licensure Examination for Teachers (LET Application and Eligibility Guide)


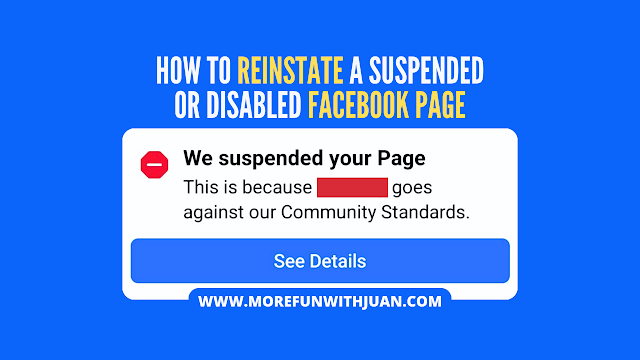
Finding your Facebook page suspended or disabled can be a frustrating and confusing experience, especially when it's a vital platform for your business, community, or personal brand. Unlike simply unpublishing your page, a suspended Facebook page means Facebook has taken action due to a detected violation of its policies. But don't despair—there's often a path to reinstate your Facebook page.


This guide will walk you through the essential steps to understand why your page might have been suspended and how to appeal Facebook's decision effectively.


Loading...

Understanding Why Your Facebook Page Was Suspended

Before you can fix the problem, you need to know what went wrong. Facebook typically notifies the page administrator about the reason for the suspension, often via email. Common reasons for a disabled Facebook page include:

  • Violations of Community Standards: This is broad and covers content issues like hate speech, misinformation, spam, harassment, incitement to violence, promoting illegal activities, or explicit content.

  • Breaches of Advertising Policies: If your page runs ads, non-compliance with Facebook's detailed ad policies (e.g., misleading claims, prohibited products/services, discriminatory practices) can lead to suspension.

  • Inauthentic Behavior: Using fake profiles to manage the page, buying likes or followers, or engaging in coordinated inauthentic behavior to manipulate engagement.

  • Copyright or Trademark Infringement: Posting content (images, videos, music, text) that you don't have the legal rights to use.

  • Security Compromises: If Facebook detects suspicious activity, it might temporarily suspend a page to protect it from unauthorized access.

Always check the email associated with your Facebook account (including spam or junk folders) for a detailed notification from Facebook. This email is your first clue and often contains a direct link to begin the appeal process.


How to Reinstate Your Suspended Facebook Page: A Step-by-Step Guide

The primary method to reinstate a suspended Facebook page is through Facebook's appeal process. Follow these steps carefully:


Step 1: Locate the Appeal Option

Check Your Email: Your suspension notification email from Facebook is the most direct route. Look for an "Appeal" button or link within that email.

  • Log In to Facebook: Try logging into the personal Facebook profile that manages the suspended page. Often, you'll see a pop-up or a notification at the top of your screen with information about the suspension and an option to "Appeal Decision" or "Request Review."

  • Visit the Facebook Help Center: If direct links aren't available, navigate to the Facebook Help Center and search for terms like "disabled page," "suspended page," or "appeal page suspension" to find the relevant forms or instructions.


Step 2: Submit Your Appeal and Provide Necessary Information

Once you find the appeal option, you'll be guided through a form. Be prepared to:

  • Confirm Your Identity: Facebook may ask you to verify your identity. This can involve entering a phone number to receive a verification code or, more commonly, uploading a clear photo of a government-issued ID (e.g., passport, driver's license, national ID card). Ensure the name on your ID precisely matches the name on the Facebook profile associated with the page.

  • Explain Your Case: This is your opportunity to tell Facebook why your page should be reinstated.

  • Be Clear and Concise: Get straight to the point.

  • Be Polite and Respectful: Avoid aggressive or demanding language.

  • Be Honest: If you understand what caused the violation, acknowledge it. Explain what steps you have already taken, or commit to taking, to prevent future violations. For example, "I understand my page mistakenly shared content that violated your spam policy. I have since removed all such posts and reviewed the Community Standards to ensure future compliance."

  • Be Specific: If you genuinely believe the suspension was a mistake, explain why. For instance, "I believe my page was suspended in error. All content adheres to Community Standards, and I have not engaged in any inauthentic behavior."

  • Provide Supporting Evidence (If Applicable): Attach any relevant screenshots or documents that support your claim. This could include screenshots showing content removal, policy review completion, or proof of original content ownership.


Step 3: Await Facebook's Review and Decision

After you submit your appeal, Facebook will review your case. This process can vary significantly in length, from a few days to several weeks, depending on the complexity of the issue and their current support volume.

  • Monitor Your Email: Regularly check the email address linked to your account for updates on your appeal status.

  • Periodically Attempt to Log In: Even without an email notification, try accessing your page occasionally. Sometimes, access is restored before you receive a formal email.


Step 4: What If Your Appeal is Denied or You Receive No Response?

If your initial appeal is rejected, or if you don't hear back after a prolonged period, your options become more limited:

  • Re-appeal (If Available): Facebook sometimes allows for a second appeal after a certain waiting period, especially if you have new information or if the first review seems insufficient.

  • Meta Business Support (for Business Suite Users): If your page is managed through Meta Business Suite/Manager, you might have access to a direct chat support option. This can provide a more direct channel for communication regarding your page.

  • Consider a New Page (Last Resort): If all attempts to reinstate the original page fail and Facebook confirms its permanent disablement, you may be left with no choice but to create a new page. If you do this, ensure you strictly adhere to all of Facebook's Community Standards and policies from day one to prevent recurrence.


Tips to Prevent Future Page Suspensions

Prevention is always better than cure. To safeguard your Facebook page from future suspensions:

  • Know the Rules: Thoroughly familiarize yourself with Facebook's Community Standards and Advertising Policies. Review them periodically, as they can be updated.

  • Content Compliance: Ensure all content you post (text, images, videos, links) strictly adheres to these guidelines. Avoid anything that could be interpreted as spam, hate speech, misinformation, or copyright infringement.

  • Authentic Engagement: Build your audience and engagement organically. Avoid using artificial methods like buying likes, followers, or comments, as these are easily detectable and policy violations.

  • Secure Your Account: Use a strong, unique password for your Facebook profile that manages the page. Enable two-factor authentication (2FA) for an extra layer of security to prevent unauthorized access.

  • Regular Review: Periodically audit your page's content, comments, and messages for any user-generated content that might violate policies.

By understanding Facebook's policies and proactively managing your page, you can significantly reduce the risk of suspension and ensure your online presence remains active and thriving.

Have you experienced a page suspension? Share your tips or questions in the comments below.


Related Guides


How to Fix or Reinstate a Suspended or Disabled Facebook Page


If you recently took the Civil Service Exam (CSE) in the Philippines and are eagerly waiting for the results, here’s a straightforward guide to help you check whether you passed. The Civil Service Commission (CSC) typically releases the results within 60 to 90 days after the examination date.


1. Wait for the Official Release Date

Before checking, make sure that the results have already been released. The CSC announces the release of the CSE results on its:

Official website: https://www.csc.gov.ph


Stay updated by following their pages or joining groups dedicated to CSE takers.

Loading...

2. Check via the CSC Website

Once the results are out, follow these steps:

Step-by-step:
  1. Go to the CSC Examination Result Generation System (ERGS) at https://erpo.csc.gov.ph/ocsergs

  2. Select the type of exam (CSE Professional or Subprofessional).

  3. Enter your personal details:

    • Examinee Number (if available)
    • Last Name
    • First Name
    • Middle Initial
    • Date of Birth

  4. Click “Generate” to view your result.

You’ll be shown your rating, and whether you passed or failed.


3. Check the List of Passers (PDF)

The CSC also uploads a region-based PDF list of passers. Here's how to find it:

  1. Go to https://www.csc.gov.ph

  2. Click the announcement for the latest CSE passers.

  3. Download the List of Passers for your region (e.g., NCR, Region IV-A).

  4. Open the PDF and search your name using Ctrl+F (Command+F on Mac).


4. Wait for the Certificate of Eligibility (If You Passed)

If you passed, you will receive a Certificate of Eligibility (CoE) from the CSC Regional or Field Office where you took the exam. Wait for the announcement from your CSC regional office on when to claim it.

Requirements when claiming:

  1. Valid ID (same as presented during the exam)

  2. Application receipt or any official exam-related document

  3. Follow any other instructions specific to your CSC Regional Office


Bonus Tip: Use OCSERGS for Rating Inquiry

Even if you didn’t pass, you can still view your score (rating) via the OCSERGS portal for self-assessment and improvement.


Final Thoughts

Checking your CSE result is quick and free—as long as you use the official CSC channels. Be cautious of third-party sites that claim to offer results but ask for payment or personal information.

Good luck, and whether you passed or not, remember that every exam is a step toward growth and better opportunities!

How and Where to Check Civil Service Exam (CSE) Results in the Philippines


Facebook is no longer just a social media platform—it's now one of the top monetization tools for creators and businesses alike. With over 3 billion monthly active users, Facebook offers several powerful ways to generate income in 2025, whether you create videos, go live, share short-form Reels, or manage a niche page.

In this guide, we’ll break down every way you can make money on Facebook, how to qualify, and how to optimize your content for maximum revenue.


Who Can Monetize on Facebook in 2025?

To monetize, you must meet Facebook’s Monetization Eligibility Standards, including:

  • Being at least 18 years old

  • Having a Facebook Page (not just a personal profile)

  • Complying with Partner Monetization Policies

  • Residing in an eligible country

  • Use the Facebook Creator Studio or Meta Business Suite to check your page's monetization eligibility.


Loading...

Top Ways to Earn Money on Facebook


1. In-Stream Ads (Video Monetization)

Monetize long-form videos (3+ minutes) with ads that play before, during, or after your content.

Requirements:

  • 10,000+ Page followers
  • 600,000 total minutes viewed in the last 60 days
  • At least 5 active videos

Types of Ads:

  • Pre-roll
  • Mid-roll
  • Image overlay

CPM Range: $2 – $10+, depending on niche and audience


2. Facebook Reels Play Bonus (Short-Form Content)

Reels (60 seconds or less) can earn bonuses or ad revenue via the Reels monetization program.

Requirements:

  • 5 original Reels in the last 30 days
  • At least 100,000 Reels plays in the last 30 days
  • Compliance with Meta’s Creator Policies

Bonuses vary—some creators earn $500 to $35,000/month during incentive periods.


3. Fan Subscriptions (Monthly Memberships)

Let fans support you monthly with a recurring fee ($4.99–$29.99/month) in exchange for exclusive content, badges, and perks.

Requirements:

  • 10,000+ followers OR 250 returning viewers
  • 50,000 post engagements in the last 60 days
  • Or 180,000 minutes watched in the last 60 days


4. Stars (Tips from Viewers)

Fans can buy Stars and send them to you during live streams or Reels. You earn $0.01 per Star.

Great for:

  • Gaming streams
  • Q&A sessions
  • Live performances or tutorials

Stars can be turned on even for smaller pages.


5. Branded Content (Sponsorships)

Collaborate with brands using Facebook’s Brand Collabs Manager. Share sponsored posts or videos that brands pay for.

Requirements:

  • 1,000 followers
  • 15,000 post engagements or 180,000 video minutes watched in the past 60 days

Branded deals often pay $100 to $10,000+ per campaign depending on your reach.


6. Affiliate Marketing on Facebook

Promote products and services through affiliate links in posts, Reels, or Stories.

  • Use link shorteners or tracking platforms
  • Best for niche pages (tech, beauty, fashion, fitness)
  • Combine with Reels, giveaways, and polls for more clicks

Popular affiliate networks:

  • Amazon Associates
  • CJ Affiliate
  • ClickBank
  • Impact
  • InvolveAsia


7. Facebook Marketplace & Shops (For Product Sellers)

If you’re selling physical products, set up a Facebook Shop or sell through Marketplace.

  • Integrated with Shopify, WooCommerce, and Instagram
  • Use live shopping events and product tags to boost conversions


How Facebook Pays Creators


Revenue Share: You keep 55–70% depending on the monetization type

Payment Method: Direct deposit or PayPal via Meta Pay

Minimum Payout: $100

Payment Schedule: Monthly, around the 21st


Tips to Maximize Facebook Earnings


🎯 Post Consistently


3–5 times per week with a mix of Reels, videos, and Lives

Stay on trend with audio, memes, and viral formats


📈 Know Your Analytics


Use Creator Studio to track watch time, engagement, and demographics

Identify your top content and replicate its success


🧲 Use Catchy Thumbnails and Titles


Just like YouTube, your visual hook matters

Test emojis, hooks, or questions in titles


🤝 Engage With Fans


Reply to comments and messages

Go live regularly to boost trust and build community


🚀 Promote Cross-Platform


Share Facebook content to Instagram, Threads, Twitter/X, and email lists

Embed Reels or videos on your website or blog


Frequently Asked Questions (FAQs)


1. How much can a Facebook creator earn per month?
Earnings vary based on reach, niche, and monetization methods.


Many creators combine Reels bonuses, fan subscriptions, affiliate sales, and Stars to boost income.


2. Can I monetize my personal Facebook profile?
No. Only Facebook Pages (Business or Creator profiles) can be monetized. You must convert your profile into a page or start a new one to begin earning.


3. Is it free to monetize on Facebook?
Yes. Creating a page and joining monetization programs is 100% free. Facebook takes a small percentage (usually 30%) of things like Stars or fan subscriptions.


4. Do I need to post videos to earn?
Yes, videos are the primary path to monetization—especially for Reels, in-stream ads, and Stars. Text and photo posts alone do not earn ad revenue.


5. How long does it take to start making money?
With consistent content and promotion, creators can reach monetization thresholds within 30 to 90 days. Viral Reels or Lives can accelerate the process.


6. Is Facebook monetization available in my country?
Facebook monetization is supported in 100+ countries, but features like Stars or Subscriptions may be restricted in some regions. Check your eligibility in Creator Studio > Monetization.


Final Thoughts

Facebook in 2025 is more than a social network—it's a fully-fledged creator economy. From Reels bonuses to Stars, affiliate sales, and brand deals, there are endless ways to build a real income stream on the platform.

Success on Facebook comes down to:

  • Consistency

  • Creativity

  • Community engagement

  • Cross-platform promotion

Whether you're a content creator, a business owner, or someone looking to earn from your passion—Facebook offers a scalable, low-barrier opportunity to monetize your voice.


Other Ways to Make Money Online

How to Make Money on Facebook (Content Creator Monetization Guide)


If you hold a Technical Education and Skills Development Authority (TESDA) National Certificate Level II (NC II), you already know how valuable it is. Whether you are applying for a promotion, seeking local employment, or preparing for a job overseas, an NC II serves as official proof of your professional competency.

However, TESDA National Certificates are valid for five (5) years. Once that period expires, your credential becomes inactive, which can delay job applications or visa processes.

The good news? Yes, TESDA NC II certificates can be renewed.


Do You Need to Retake the Assessment Exam?

The short answer is it depends on whether your industry's standards have changed.

  • No Exam Required (Direct Renewal): If TESDA’s official Training Regulations (TR) for your qualification have remained the same over the last 5 years, you do not need to retake the exam. You simply submit proof that you have been actively using your skills in the industry.

  • Re-Assessment Required: If TESDA promulgated updated or new Training Regulations for your trade while your certificate was active, you cannot undergo direct renewal. You will be required to take a re-assessment based on the updated competency standards.


Key Requirements for TESDA NC II Renewal

Before heading to the nearest TESDA office, make sure you have prepared the following documents:

DocumentDetails & Specifications
Duly Accomplished Application FormDownloadable via TESDA online or available at the issuing office.
Original NC II CertificateYour expired physical certificate (or previous copy).
Passport-Sized ID Photos3 pieces, colored, white background, wearing a collared shirt, with a printed name tag at the back.
Certificate of Employment (COE)Must show at least 12 cumulative months of industry or teaching experience related to your NC II field within the 5-year validity period.
Government-Issued IDOriginal and photocopy for identity verification.
Processing FeeTypically ₱100 to ₱150, depending on the issuing regional or provincial office.

Note for Self-Employed Applicants: If you operate an independent business using your skill (e.g., freelance electrician, mobile chef, independent auto mechanic), submit a formal certification issued by an official from a relevant government agency (such as your local Barangay, DTI, or LGU).  


Step-by-Step NC II Renewal Process


1. Verify Your Certificate Status
Visit the official TESDA Online Portal (e-TESDA) and check the Registry of Certified Workers to verify your existing certificate records and ensure your details are active in the central database.


2. Submit Documents to TESDA
Go to the TESDA District, Provincial, or Regional Office that originally issued your NC II (or the nearest provincial office in your current region). Submit your completed application form and supporting documents to the certification desk.


3. Pay the Renewal Fee
Once your documents pass evaluation, proceed to the cashier and pay the renewal fee. Secure your Official Receipt (OR) and claim stub/admission note.


4. Claim Your Renewed NC II
Return on the designated release date given by the TESDA officer. Present your Official Receipt and valid ID. In many updated regional centers, TESDA also issues a verified digital e-Certificate direct to your email address.


Proactive Tips for a Smooth Renewal


Renew Early: Don't wait until the exact week your NC II expires. Processing times vary by region and can take anywhere from a few hours to several business days. Begin the process 1 to 2 months before your certificate's expiration date.

Authorized Representatives: If you are currently working abroad as an OFW, an authorized representative can process your renewal in the Philippines. They must present a Special Power of Attorney (SPA) alongside your original documents and valid IDs.

Watch Out for Photo Rules: TESDA is strict regarding ID photos. Photos must be taken in a collared shirt, on a plain white background, without eyeglasses, and with a printed name tag (Last Name, First Name, Middle Name) visible.


Keep Your Workplace Credentials Active

Keeping your TESDA National Certificate up to date ensures your competitive edge in the job market remains uncompromised. By staying aware of your 5-year expiration window and maintaining a documented record of your employment history, renewing your NC II is a straightforward administrative process.

If your NC II is nearing its expiration date, gather your employment certificates, drop by your local TESDA office, and secure your credentials for another five years.


How to Renew Your TESDA NC II: A Complete Step-by-Step Guide for Skilled Workers


The Ultimate Guide to Making Taho: A Filipino Delight


Taho is a beloved Filipino delicacy that holds a special place in the hearts of many. This sweet treat consists of soft tofu, sweet syrup (arnibal), and sago pearls. It's not just a delicious snack; it's also a cultural icon, often sold by vendors in the morning as a staple breakfast option or as an afternoon pick-me-up. Making taho at home allows you to enjoy this delightful treat anytime you crave it, and it's surprisingly easy to prepare. Follow this comprehensive guide to master the art of making taho in your own kitchen.

Loading...

Ingredients


Equipment

  • Large pot
  • Small pot
  • Colander
  • Cheesecloth or fine mesh strainer
  • Ladle or spoon
  • Bowls or cups for serving


Step-by-Step Guide


Prepare the Tofu:
  • Drain the soft tofu from its packaging and cut it into small cubes. Traditional taho uses soft tofu with a silky texture, but if you prefer a firmer texture, you can freeze the tofu beforehand and then thaw it before using.

Cook the Sago Pearls:
  1. Bring a pot of water to a boil and add the sago pearls.
  2. Cook the sago pearls according to the package instructions, usually boiling them for about 10-15 minutes until they become translucent.
  3. Once cooked, drain the sago pearls and rinse them under cold water to prevent them from sticking together. Set aside.

Make the Arnibal (Sweet Syrup):
  1. In a small pot, combine equal parts brown sugar and water.
  2. Heat the mixture over medium heat, stirring constantly until the sugar has completely dissolved.
  3. If desired, add flavorings like a splash of vanilla extract or a few pandan leaves for an aromatic touch.
  4. Once the syrup thickens slightly, remove it from the heat and let it cool.

Assemble the Taho:
  1. Line a colander with cheesecloth or a fine mesh strainer.
  2. Place the cubed tofu in the colander, spreading it out evenly.
  3. Gently pour the warm arnibal over the tofu, ensuring that it's evenly coated.
  4. Allow the excess syrup to drain off into a bowl beneath the colander.

Serve and Enjoy:
  1. Once the excess syrup has drained off, transfer the sweetened tofu cubes to serving bowls or cups.
  2. Add a spoonful of cooked sago pearls on top of the tofu cubes.
  3. Drizzle a little more arnibal over the top, if desired.
  4. Serve the taho warm and enjoy its delightful sweetness and silky texture.


ATTRACTIONS TO SEE IN MANILA 

Klook.com

Tips and Variations

Adjust the sweetness of the arnibal according to your preference by adding more or less brown sugar.

Experiment with different flavorings such as pandan extract or coconut milk for a unique twist on the classic taho recipe.

Serve taho warm for the best texture and flavor, but it can also be enjoyed chilled on hot summer days.

Store any leftover taho components separately in the refrigerator and assemble them just before serving to maintain freshness.

 
Making taho at home is a rewarding culinary experience that allows you to savor the flavors of this beloved Filipino treat whenever the craving strikes. With just a few simple ingredients and some basic cooking techniques, you can recreate the magic of taho in your own kitchen. Whether enjoyed as a breakfast staple or a sweet indulgence any time of day, homemade taho is sure to delight your taste buds and evoke fond memories of the Philippines.


How to Make Taho (Silken Tofu with Sago Pearls and Brown Sugar Syrup)